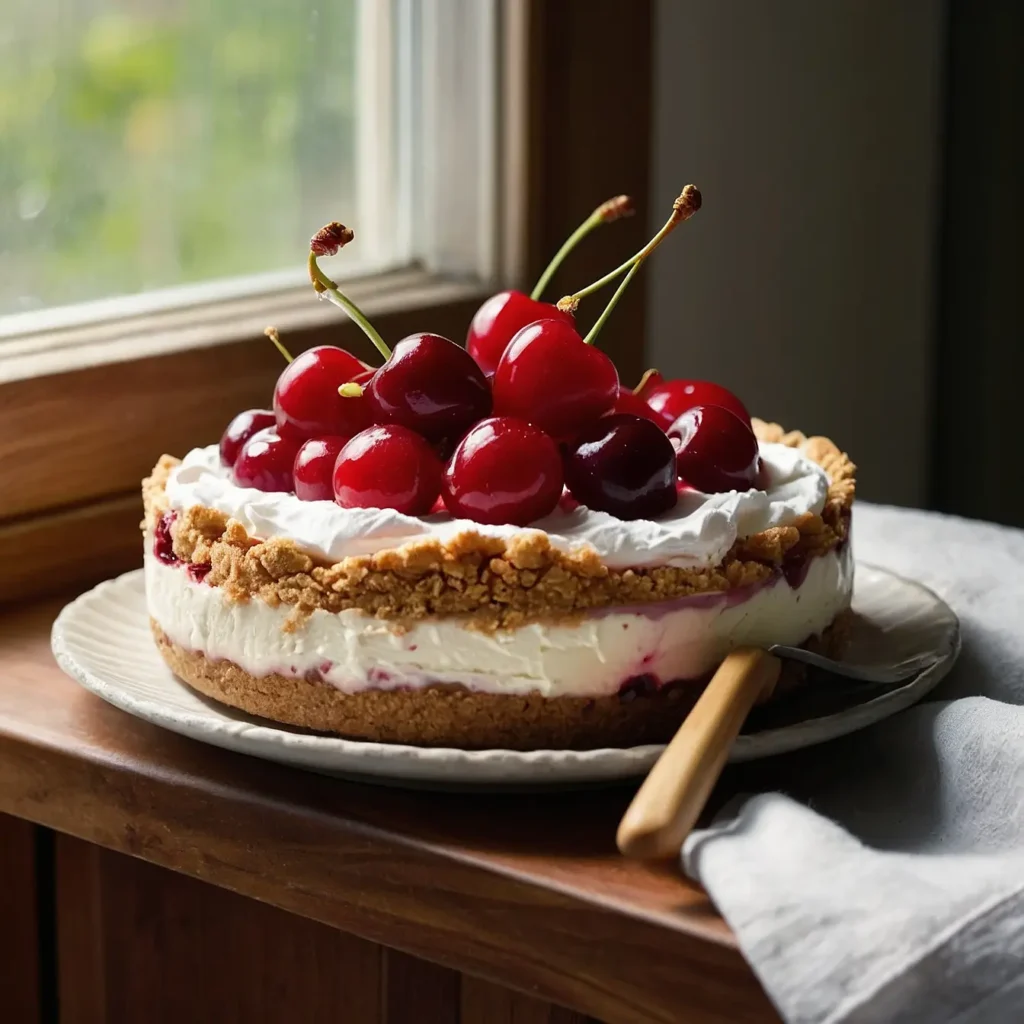
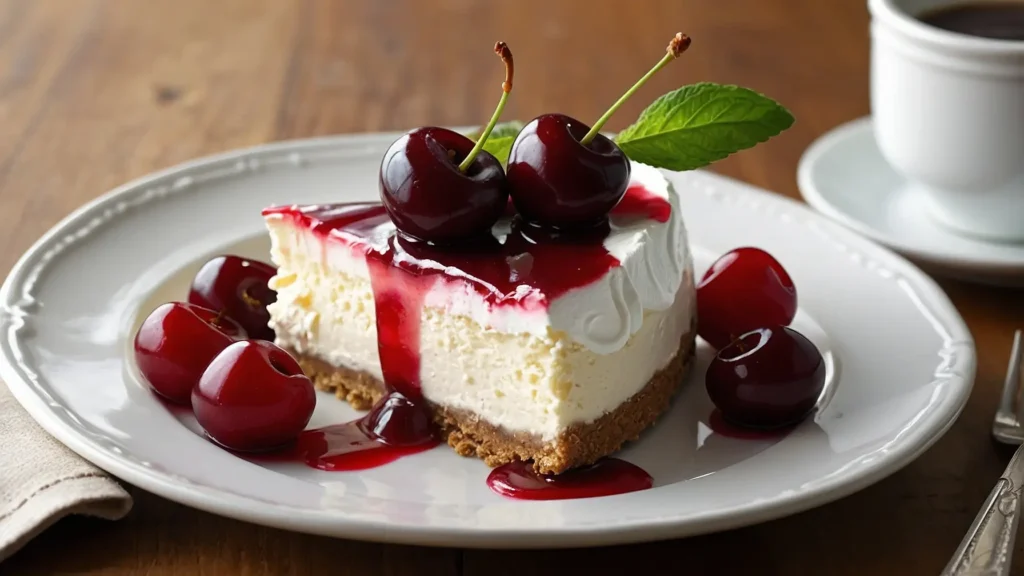
Who doesn’t love a dessert that’s both indulgent and effortless to make? This Cool Whip cherry cheesecake is the ultimate treat for those craving creamy, tangy, and sweet flavors wrapped in one delightful bite. Perfect for any occasion, this no-bake dessert combines the convenience of Cool Whip with the richness of cream cheese and the vibrant allure of cherries. Whether you’re hosting a party or treating yourself to a quiet evening, this recipe delivers an elegant, crowd-pleasing dessert without turning on the oven. Let’s dive in and discover just how easy it is to create this irresistible masterpiece!
Table of Contents

Recipe Card
Recipe name: Cool Whip Cherry Cheesecake
Description: Treat yourself to the creamy, fruity delight of a Cool Whip cherry cheesecake! This no-bake dessert features a buttery graham cracker crust, a smooth and fluffy cream cheese filling, and a vibrant cherry topping. Perfect for any gathering or as an indulgent treat, this cheesecake is simple to prepare and guaranteed to impress.
- Prep Time: 15 minutes
- Chill Time: 4 hours
- Total Time: 4 hours and 15 minutes
- Servings: 8
- Calories: Approximately 350 per serving
Ingredients
- 1 1/2 cups graham cracker crumbs
- 1/2 cup melted butter
- 16 oz cream cheese, softened
- 1 cup powdered sugar
- 1 tsp vanilla extract
- 1 can (21 oz) cherry pie filling or fresh cherry compote
Instructions
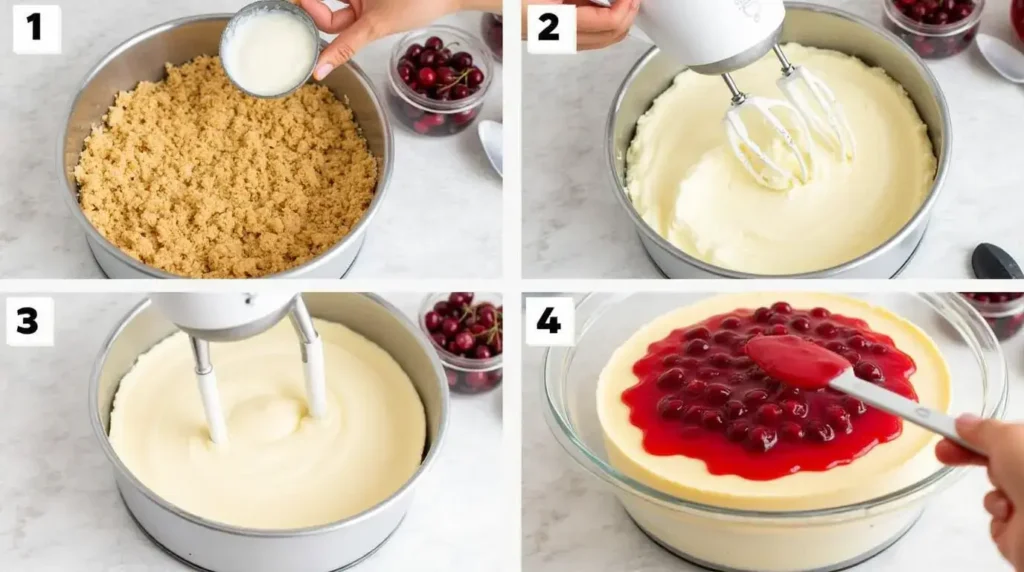
- In a mixing bowl, combine graham cracker crumbs and melted butter. Press the mixture firmly into a springform pan to form the crust.
- In a large bowl, beat the softened cream cheese, powdered sugar, and vanilla extract until smooth and creamy.
- Spread the cheesecake filling evenly over the prepared crust, smoothing the top with a spatula.
- Refrigerate the cheesecake for at least 4 hours or until set.
- Just before serving, spoon the cherry pie filling or cherry compote over the top of the cheesecake.
- Slice the cheesecake and serve chilled.
Notes
- Enhance the Flavor: Add a teaspoon of lemon juice to the filling for a subtle tang that pairs beautifully with the cherries.
- Creative Garnishes: Decorate with whipped cream, chocolate curls, or fresh mint leaves for an elegant presentation.
- Chill Time: For the best texture and clean slices, allow the cheesecake to chill overnight.
Nutrition Information (per serving)
- Calories: 350
- Total Fat: 22g
- Saturated Fat: 13g
- Cholesterol: 60mg
- Sodium: 250mg
- Total Carbohydrates: 34g
- Dietary Fiber: 1g
- Sugars: 24g
- Protein: 4g
Why You’ll Love This Recipe
This Cool Whip cherry cheesecake is the kind of dessert that brings joy to your kitchen and smiles to the table. Here’s what makes it a standout treat you’ll want to make over and over again:
- Simple and Stress-Free: You don’t need fancy tools or an oven to create this cheesecake. The no-bake method is beginner-friendly and perfect for anyone looking for a quick and easy dessert. Whether it’s your first attempt at cheesecake or your hundredth, this recipe guarantees success every time.
- Versatile for Any Occasion: This cheesecake is a perfect fit for every event, from a casual family dinner to an elegant holiday gathering. Its smooth, creamy texture and vibrant cherry topping make it as visually stunning as it is delicious.
- Always a Crowd Favorite: The combination of a buttery graham cracker crust, light and airy filling, and the sweet-tangy cherry topping is an instant hit. Whether it’s a dinner party or a potluck, this dessert will have everyone coming back for seconds.
- Endlessly Customizable: Not a fan of cherries? No problem! Swap the topping with blueberries, strawberries, or even a chocolate ganache. You can also experiment with flavored extracts in the filling, like almond or lemon, to create your own signature twist on this classic cheesecake.
- Fewer Ingredients, More Flavor: This recipe relies on simple, accessible ingredients that come together to create a dessert that feels luxurious and indulgent. It’s proof that you don’t need an endless grocery list to make something truly special.
- Convenient Make-Ahead Dessert: This cheesecake can be prepared ahead of time, giving you one less thing to worry about when entertaining. The extra chill time not only enhances the flavors but also makes slicing and serving a breeze.
How to Make Cool Whip Cherry Cheesecake (Step-by-Step)
Creating this Cool Whip cherry cheesecake is as easy as it is rewarding. Follow these simple steps to whip up a dessert that looks stunning and tastes divine. Let’s get started!
Step 1: Gather Your Ingredients and Tools
Before diving in, make sure you have all your ingredients measured and ready. Grab a springform pan, mixing bowls, a hand or stand mixer, and a spatula. Preparing everything beforehand makes the process seamless and enjoyable.
Step 2: Prepare the Graham Cracker Crust
- In a mixing bowl, combine 1 ½ cups of graham cracker crumbs with ½ cup of melted butter.
- Stir the mixture until it resembles damp sand.
- Press it firmly into the base of your springform pan, ensuring an even layer. Use the back of a spoon or the bottom of a glass for a smooth finish.
- Place the crust in the refrigerator to set while you move on to the filling.
Tip: For extra flavor, mix a pinch of cinnamon or a tablespoon of sugar into the crust.
Step 3: Whip Up the Cheesecake Filling
- Beat 16 oz of softened cream cheese in a large bowl until smooth and creamy.
- Add 1 cup of powdered sugar and 1 tsp of vanilla extract, mixing until fully incorporated.
- Gently fold in 1 tub (8 oz) of Cool Whip using a spatula. This keeps the mixture light and fluffy.
Tip: Make sure your cream cheese is at room temperature to avoid lumps in the filling.

Step 4: Assemble the Cheesecake
- Retrieve your chilled crust from the refrigerator.
- Spread the cream cheese mixture evenly over the crust, smoothing the top with a spatula.
- Cover the pan with plastic wrap and refrigerate for at least 4 hours, or ideally overnight, to allow the cheesecake to firm up.
Tip: For an ultra-smooth top, use an offset spatula or the back of a spoon.
Step 5: Add the Cherry Topping
- Once the cheesecake is set, evenly spread 1 can (21 oz) of cherry pie filling over the top.
- Let the vibrant cherry topping cascade to the edges for a beautiful finish.
Tip: If you prefer a homemade touch, prepare a fresh cherry compote with sugar, lemon juice, and fresh cherries simmered together.
Step 6: Slice and Serve
- Remove the cheesecake from the springform pan.
- Slice into portions using a sharp knife, wiping the blade clean between cuts for neat slices.
- Serve chilled and enjoy the creamy, tangy, and sweet combination in every bite!
Tip: Garnish with whipped cream, fresh mint leaves, or a sprinkle of chocolate shavings for an added touch of elegance.
Key Ingredients and Substitutions
Crafting the perfect Cool Whip cherry cheesecake starts with a handful of simple ingredients. Here’s a quick rundown and how you can adjust them to suit your preferences:
Graham Cracker Crumbs
- Purpose: Forms the buttery, crumbly crust.
- Alternative: Use crushed digestive biscuits, vanilla wafers, or gluten-free cookies for dietary adjustments.
Cream Cheese
- Purpose: Provides the rich, creamy base of the filling.
- Alternative: Swap with Neufchâtel cheese, reduced-fat cream cheese, or vegan options for a lighter or dairy-free version.
Powdered Sugar
- Purpose: Sweetens and smooths the filling without a grainy texture.
- Alternative: Blend granulated sugar to a powder if needed. Adjust sweetness to your liking.
Cool Whip
- Purpose: Adds an airy, fluffy texture to the filling.
- Alternative: Replace with homemade whipped cream or coconut whipped cream for a plant-based option.
Cherry Topping
- Purpose: Adds a vibrant, fruity finish that balances the creamy filling.
- Alternative: Use homemade cherry compote or switch it up with blueberries, strawberries, or raspberries for variety.
Butter
- Purpose: Binds the crust for a firm base.
- Alternative: Coconut oil or margarine works as a dairy-free substitute.
Expert Tips for Success
Make your Cool Whip cherry cheesecake perfect every time with these quick tips:
1. Soften the Cream Cheese
- Room temperature cream cheese blends smoothly, ensuring a silky filling.
Tip: Cut it into small cubes to speed up softening.
2. Chill for Best Texture
- Refrigerate for at least 4 hours, or overnight for firmer slices.
Tip: Cover tightly to keep it fresh.
3. Fold Cool Whip Gently
- Preserve the fluffy texture by folding Cool Whip carefully into the mixture.
Tip: Avoid overmixing to keep it light.
4. Press the Crust Firmly
- Use a glass or measuring cup to press the crust into the pan for a solid base.
Tip: Chill the crust for 10 minutes before adding the filling.
5. Customize Your Topping
- Swap cherry for berries, caramel, or chocolate for a unique twist.
Tip: Add toppings just before serving for a fresh look.
6. Neat Slices Every Time
- Dip your knife in warm water and wipe it clean after each cut.
Tip: A serrated knife works well on the crust.
Variations and Customizations
Make this Cool Whip cherry cheesecake your own with these easy ideas:
1. Topping Twists
- Swap cherries for berries, tropical fruits, or a chocolate drizzle.
- Add caramel or spiced apple compote for a seasonal vibe.
2. Filling Flavors
- Add lemon juice for tanginess or almond extract for warmth.
- Sprinkle crushed nuts or cookie crumbs for extra texture.
3. Crust Options
- Try gingersnaps, chocolate cookies, or gluten-free alternatives.
- Add a pinch of cinnamon for a spiced flavor.
4. Mini Cheesecakes
- Use muffin tins for bite-sized portions, perfect for parties!
5. Vegan Version
- Use vegan cream cheese and plant-based whipped topping for a dairy-free dessert.
Storage and Reheating Instructions
Keep your Cool Whip cherry cheesecake fresh and delicious with these straightforward storage tips. Whether you’re saving leftovers or planning ahead, proper storage ensures every slice tastes as good as the first.
1. Storing in the Refrigerator
- Cover the cheesecake tightly with plastic wrap, or place individual slices in an airtight container.
- Store in the fridge for up to 4-5 days to maintain its creamy texture and fresh flavor.
Tip: To prevent the cherry topping from seeping into the filling, store it separately if you’re keeping the cheesecake for more than a day.
2. Freezing for Later
- Wrap the cheesecake securely in plastic wrap, followed by a layer of aluminum foil to prevent freezer burn.
- For easier serving, freeze individual slices in freezer-safe containers.
- Label with the date and store in the freezer for up to 2 months.
Tip: Add the cherry topping only after thawing to preserve its vibrant color and fresh taste.
3. Thawing the Cheesecake
- Transfer the cheesecake from the freezer to the fridge and let it thaw overnight for a smooth, creamy texture.
- Gradual thawing ensures the filling remains firm and retains its shape.
Tip: Avoid leaving the cheesecake at room temperature to thaw, as this can cause it to soften too much.
4. Serving Suggestions
- Cheesecake is best served chilled, but if you prefer a softer texture, allow a slice to sit at room temperature for 10-15 minutes before serving.
- Avoid reheating in the microwave, as it can alter the creamy consistency.
Serving Suggestions
Your Cool Whip cherry cheesecake is a masterpiece, and serving it just right can make it even more memorable. Here are some creative and practical ideas to elevate your presentation and enhance the experience for your guests:
1. Classic Presentation
- Slice the cheesecake and serve it on elegant dessert plates.
- Add a small dollop of whipped cream next to each slice for a timeless look.
- Use a serrated knife dipped in warm water for clean, precise cuts.
2. Fresh Fruit Garnish
- Brighten up each slice with a few fresh cherries, raspberries, or sliced strawberries.
- Sprinkle a handful of mixed berries around the plate for a pop of color and added flavor.
3. Chocolate or Caramel Drizzle
- Drizzle chocolate or caramel sauce over each slice for a rich, indulgent touch.
- Create a zigzag or swirl pattern for a bakery-style presentation.
4. Add a Crunchy Element
- Top each slice with crushed graham crackers, cookie crumbs, or chopped nuts.
- This adds texture and makes the dessert even more exciting to bite into.

5. Mint Leaves for a Refreshing Touch
- Place a fresh mint leaf or two on each slice for a subtle aroma and a vibrant green accent.
6. Pair with Beverages
- Serve with a cup of freshly brewed coffee, espresso, or a glass of sweet dessert wine.
- For a refreshing non-alcoholic option, pair with iced tea or lemonade.
7. Seasonal Themes
- For a festive touch, sprinkle the plate with edible glitter, holiday sprinkles, or a dusting of powdered sugar.
- Use candied citrus zest or peppermint bits during holidays for a seasonal flair.
8. Individual Mini Cheesecakes
- Transform your cheesecake into mini servings by using muffin tins.
- Decorate each one uniquely, giving guests a personalized experience.
Frequently Asked Questions FAQ
Got questions about making the perfect Cool Whip cherry cheesecake? Don’t worry—here are answers to some of the most common queries to help you create a flawless, delicious dessert every time.
What is a Cool Whip cherry cheesecake?
A Cool Whip cherry cheesecake is a no-bake dessert. It combines Cool Whip’s airy texture with cream cheese’s creamy flavor, and cherries add a sweet-tart taste.
Why are no-bake desserts like Cool Whip cheesecake a game-changer?
No-bake desserts, like Cool Whip cheesecake, are easy to make and don’t require an oven, making them perfect for any occasion.
How versatile is Cool Whip cheesecake?
Cool Whip cheesecake is very versatile. Thanks to its adaptability, you can make it in many ways, making it great for any event.
Related Recipes
If you loved making this Cool Whip cherry cheesecake, you’ll adore these other simple, no-bake desserts that are equally delicious and perfect for any occasion. Expand your dessert repertoire with these exciting ideas:
- No-Bake Strawberry Cheesecake: Swap cherries for fresh strawberries in this fruity twist on the classic cheesecake. With its creamy filling and juicy topping, it’s a summer favorite.
- Chocolate Mousse Cheesecake: Combine the richness of chocolate mousse with a no-bake cheesecake base. This dessert is perfect for chocolate lovers craving something light yet indulgent.
- Lemon Blueberry Icebox Cake: Layers of lemon cream, blueberries, and graham crackers create a refreshing no-bake treat that’s as easy to make as it is to enjoy.
Conclusion
This Cool Whip cherry cheesecake isn’t just a dessert—it’s a delightful blend of simplicity, flavor, and charm. With its smooth, creamy filling, buttery graham cracker crust, and vibrant cherry topping, it’s a recipe designed to impress without the stress.
Whether you’re creating it for a festive occasion, a casual gathering, or simply to treat yourself, this no-bake cheesecake makes the process effortless and enjoyable. The endless possibilities for customization also mean you can make it uniquely yours, time and time again.
So, gather your ingredients, follow these easy steps, and enjoy the satisfaction of crafting a dessert that’s as beautiful as it is delicious. The joy it brings to your table is sure to make it a favorite for years to come.
Now it’s your turn—get creative, have fun, and savor every bite. Don’t forget to share your cheesecake creations and the personal twists you’ve added to make this recipe truly your own!

