
Who can resist the creamy, dreamy combination of strawberries and cheesecake? Now imagine that in ice cream form—a luscious dessert that’s equal parts refreshing and indulgent. Whether you’re craving a sweet summer treat or looking to impress your guests with a homemade masterpiece, this strawberry cheesecake ice cream checks all the boxes. It’s easy to make, bursting with real fruit flavor, and doesn’t require an ice cream maker. Get ready to transform a handful of simple ingredients into a show-stopping dessert that’ll have everyone asking for seconds!
Table of Contents
Recipe Card
Recipe name: strawberry cheesecake ice cream
Description: This strawberry cheesecake ice cream is a delightful blend of creamy cheesecake flavor and the fresh, tangy sweetness of strawberries. Made with simple ingredients and no ice cream maker required, it’s the perfect dessert to enjoy at home or share with loved ones. Every scoop delivers the nostalgic joy of classic ice cream with a gourmet twist!
- Prep Time: 20 minutes
- Freeze Time: 6 hours (or overnight)
- Total Time: 6 hours 20 minutes
- Servings: 8
- Calories: ~280 per serving
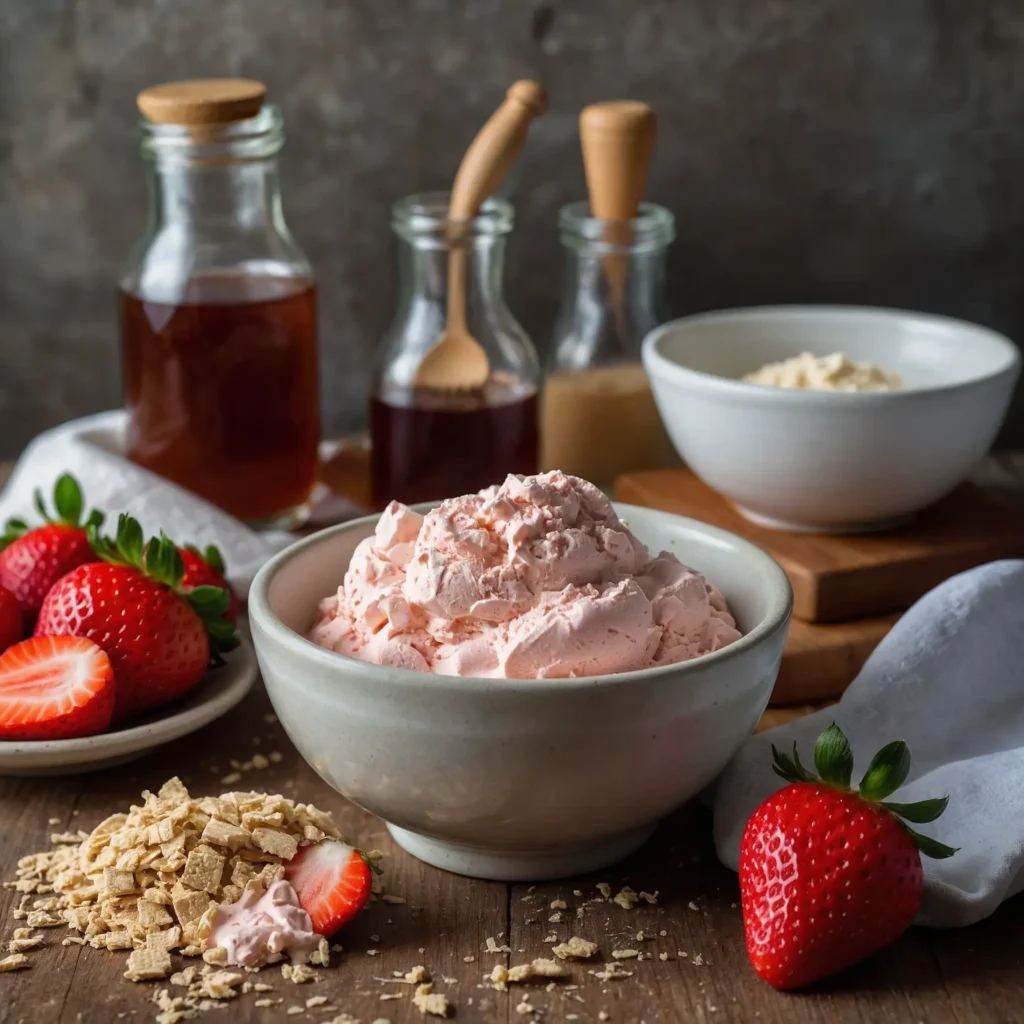
Ingredients
For the Ice Cream Base:
- 1 ½ cups fresh strawberries (hulled and diced)
- ½ cup granulated sugar
- 1 tsp vanilla extract
- 1 cup heavy cream (cold)
- ½ cup cream cheese (softened)
- ½ cup condensed milk
For the Cheesecake Swirl:
- ½ cup graham cracker crumbs
- 2 tbsp melted butter
Instructions
- Prepare the Strawberry Mixture:
- In a medium bowl, combine diced strawberries and granulated sugar. Let sit for 10 minutes until the strawberries release their juices. Mash slightly with a fork for a chunky texture or puree for a smoother consistency.
- Make the Ice Cream Base:
- In a large bowl, whip the heavy cream until it holds firm, fluffy peaks. Set aside.
- In another bowl, whisk together softened cream cheese, condensed milk, and vanilla extract until smooth. Gently fold in the whipped cream and the prepared strawberry mixture until fully combined.
- Create the Cheesecake Swirl:
- Combine the graham cracker crumbs with melted butter, stirring until the mixture resembles coarse sand. Set aside.
- Layer and Freeze:
- Pour half of the ice cream mixture into a freezer-safe container. Sprinkle a layer of graham cracker crumbs over it. Repeat with the remaining ice cream and crumbs.
- Use a knife to gently swirl the layers for a marbled effect. Seal the container with a tight-fitting lid or plastic wrap, then place it in the freezer for a minimum of 6 hours, preferably overnight, to set.
Notes
- Fresh vs. Frozen: If fresh strawberries aren’t available, frozen ones work well—just thaw and drain excess liquid before using.
- Texture Tip: For extra creamy ice cream, ensure all mixing bowls and tools are chilled before use.
- Sweetness Adjustment: Feel free to adjust the sugar depending on your preferred level of sweetness.
Nutrition Information (Per Serving)
- Calories: 280
- Carbohydrates: 25g
- Protein: 3g
- Fat: 18g
- Fiber: 1g
- Sugar: 20g
Why You’ll Love This Recipe
Making strawberry cheesecake ice cream at home isn’t just about creating a delicious dessert—it’s about crafting a joyful experience. Whether you’re a seasoned home cook or trying homemade ice cream for the first time, this recipe offers something special for everyone. Here’s what makes it truly irresistible:
- No Ice Cream Maker Needed: You don’t need any fancy equipment to whip up this creamy delight. Just a few simple tools from your kitchen will do the trick!
- Bursting with Flavor: The combination of ripe strawberries, tangy cream cheese, and buttery graham crackers creates a perfect balance of sweetness and richness in every bite.
- Easy to Customize: Whether you want to make it dairy-free, add chocolate chips, or swirl in some caramel, the recipe is endlessly adaptable to suit your taste.
- Kid-Approved: With its fun cheesecake flavor and vibrant pink hue, this dessert is always a hit with little ones (and the young at heart!).
- Perfect for Any Occasion: Whether it’s a casual family night, a summer BBQ, or a celebratory gathering, this ice cream makes for a show-stopping dessert.
How to Make Strawberry Cheesecake Ice Cream (Step-by-Step)
Creating this irresistible strawberry cheesecake ice cream is simpler than you might think! With just a few easy steps, you’ll have a homemade dessert that tastes like it came from a boutique ice cream shop. Here’s how to do it:
Step 1: Prepare the Strawberries
- Start by washing, hulling, and dicing fresh strawberries.
- Combine the strawberries with sugar in a bowl and let them sit for about 10 minutes. This allows the fruit to release its natural juices, creating a sweet, flavorful base.
- Mash the strawberries lightly with a fork for a chunky texture or blend them if you prefer a smoother consistency.
Step 2: Make the Ice Cream Base
- Use a large bowl to whip the heavy cream until it holds firm, fluffy peaks. This step gives the ice cream its light and airy texture.
- In a separate bowl, mix the softened cream cheese, condensed milk, and vanilla extract until smooth and creamy.
- Carefully fold the whipped cream into the cream cheese mixture, ensuring the mixture stays airy by using gentle strokes.
Step 3: Add the Strawberries
- Incorporate the prepared strawberries into the base by folding them in slowly. This helps spread the fruit evenly without overmixing.
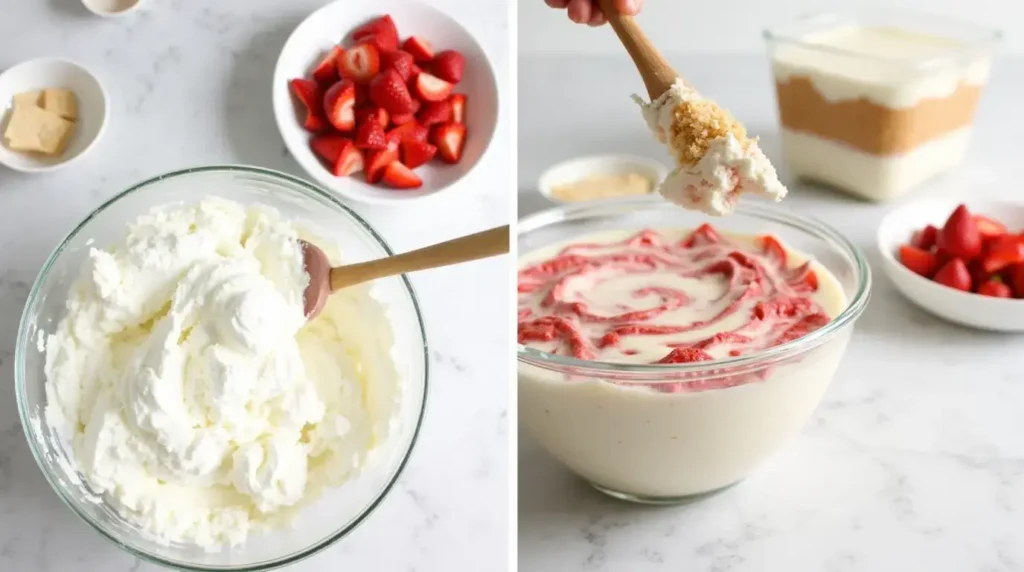
Step 4: Create the Cheesecake Swirl
- Combine graham cracker crumbs with melted butter, stirring until they resemble coarse sand.
- Layer the ice cream mixture into a freezer-safe container, alternating with spoonfuls of the graham cracker crumbs.
Step 5: Swirl and Freeze
- Use a butter knife to gently swirl the layers for a marbled effect.
- Cover the container with a lid or plastic wrap and freeze for at least 6 hours, or preferably overnight, until the ice cream is fully set.
Step 6: Scoop and Enjoy
- Remove the container from the freezer and let it sit at room temperature for a few minutes to soften slightly for easy scooping.
- Serve in bowls, cones, or even as a topping for other desserts.
Pro Tip: Keep your mixing bowls and tools chilled before starting for the creamiest results. Each step brings you closer to a dessert that’s as fun to make as it is to eat!
Key Ingredients and Substitutions
The secret to a perfect strawberry cheesecake ice cream lies in using high-quality ingredients. Each component plays a vital role in creating the creamy, flavorful dessert you’ll love. Here’s a breakdown of the key ingredients and possible substitutions to suit your preferences or dietary needs:
Key Ingredients
- Fresh Strawberries:
These provide the natural sweetness and vibrant color that make this ice cream irresistible. For the best results, choose ripe, juicy strawberries.- Substitution Tip: Can’t find fresh strawberries? Frozen ones are a great alternative—just let them thaw and drain off any extra liquid before using.
- Cream Cheese:
Opt for full-fat cream cheese to achieve the luxurious, smooth texture that sets this dessert apart.- Substitution Tip: Swap with mascarpone for a milder taste or use a plant-based cream cheese for a dairy-free option.
- Heavy Cream:
This is what gives the ice cream its luxurious, creamy consistency. Make sure to use cold cream for easy whipping.- Substitution Tip: For a lighter version, use half-and-half, though it may affect the creaminess slightly.
- Condensed Milk:
Adds sweetness and keeps the ice cream soft and scoopable without the need for churning.- Substitution Tip: Use sweetened condensed coconut milk for a dairy-free alternative.
- Vanilla Extract:
Brings depth and balance to the recipe, adding subtle yet inviting flavors that tie the ingredients together. - Graham Cracker Crumbs:
These mimic the crust of a cheesecake and add a delightful texture to the ice cream.- Substitution Tip: Use crushed digestive biscuits, gluten-free crackers, or omit for a simpler version.
Why These Ingredients Matter
Each ingredient contributes to the balance of flavors and textures in the ice cream: the strawberries bring freshness, the cream cheese adds tanginess, and the graham crackers provide a delightful crunch. Together, they recreate the essence of a classic strawberry cheesecake in frozen form.
Pro Tips for Ingredient Prep
- Strawberries: To boost the flavor, roast your strawberries with a drizzle of honey before adding them to the mix.
- Cream Cheese: Allow it to soften at room temperature for about 10 minutes for easier mixing and a silky result.
- Graham Crackers: Toast the crumbs lightly for an extra layer of flavor.
Expert Tips for Success
Creating strawberry cheesecake ice cream at home is a fun and rewarding process, but a few simple tips can help elevate your results from good to exceptional. Follow these expert tricks to ensure your ice cream is creamy, flavorful, and perfectly textured every time!
1. Keep Everything Chilled
- Always use cold heavy cream straight from the fridge for whipping. Warm cream won’t hold the air needed to create a light texture.
- Chill your mixing bowls and beaters for about 10–15 minutes before starting. This helps maintain the cream’s stability while whipping.
2. Choose the Best Strawberries
- Opt for ripe, fragrant strawberries for maximum flavor. If your strawberries are slightly tart, you can balance the taste with a touch of extra sugar.
- For frozen strawberries, thaw them completely and pat them dry to avoid excess water in the ice cream.
3. Don’t Overmix
- When folding the whipped cream into the cream cheese mixture, use gentle motions to preserve the airy texture. Overmixing can make the base dense and less creamy.
4. Perfecting the Graham Cracker Swirl
- Toast the graham cracker crumbs lightly in a dry pan before mixing with butter. This adds a subtle nutty flavor that enhances the overall taste.
- Sprinkle the crumbs evenly in layers to ensure every bite has a hint of that delicious cheesecake crust.
5. Master the Freezing Process
- Use a shallow, wide container to freeze the ice cream; it freezes more evenly and is easier to scoop.
- Cover the container with plastic wrap before sealing the lid to prevent ice crystals from forming.
6. Experiment with Add-Ins
- Get creative by adding chocolate chunks, swirls of caramel, or even a sprinkle of chopped nuts. Just ensure the add-ins are evenly distributed for consistent flavor.
7. Allow Time to Soften
- After freezing, let the ice cream sit at room temperature for 5–10 minutes before scooping. This softens it slightly and makes serving a breeze.
8. Taste Test as You Go
- Don’t forget to taste the base before freezing. Adjust the sweetness or vanilla to suit your preference, as flavors mellow slightly when frozen.
Variations and Customizations
One of the best things about homemade strawberry cheesecake ice cream is how easily you can make it your own. With a few tweaks and additions, you can create a dessert that perfectly suits your taste or dietary needs. Here are some fun and creative ways to customize this recipe:
1. Add Extra Flavors
- Chocolate Lover’s Twist: Swirl in melted dark chocolate or sprinkle mini chocolate chips throughout the layers for a rich, indulgent touch.
- Citrus Burst: Add a teaspoon of lemon or lime zest to the base for a bright, tangy flavor that complements the strawberries beautifully.
- Nutty Crunch: Stir in chopped toasted almonds, pecans, or pistachios for a delightful crunch in every bite.
2. Make It Dairy-Free
- Use plant-based cream cheese and substitute heavy cream with coconut cream or almond milk. Sweetened condensed coconut milk works perfectly in place of traditional condensed milk.
3. Explore Different Fruits
- Replace strawberries with other berries like raspberries, blueberries, or blackberries for a unique twist on the classic recipe.
- For a tropical vibe, try using diced mangoes or pineapples instead.
4. Experiment with the Crust Layer
- Swap graham cracker crumbs for crushed Oreos or ginger snaps for a bold flavor change.
- Make it gluten-free by using gluten-free cookies or crackers as your crumb base.
5. Create a Swirl Sensation
- Add a ribbon of caramel, fudge, or strawberry jam between layers for a visual and flavorful upgrade.
- For a cheesecake purist’s delight, use a swirl of tangy sour cream mixed with sugar and vanilla.
6. Adjust the Sweetness
- Prefer a less sweet dessert? Reduce the sugar in the strawberry mixture or use unsweetened condensed milk.
- If you’re looking for an extra hit of sweetness, drizzle honey or maple syrup into the base.
7. Turn It into Ice Cream Sandwiches
- Scoop the ice cream onto cookies or brownies and press gently to create homemade ice cream sandwiches. Freeze them for an hour before serving for a fun handheld treat.
8. Play with Presentation
- Serve the ice cream in edible waffle bowls, or top with fresh mint leaves and extra graham cracker crumbs for a professional finish.
Storage and Reheating Tips
1. Storing the Ice Cream
- Transfer the ice cream into a well-sealed, freezer-safe container to keep it fresh and avoid freezer burn.
- Place a layer of plastic wrap or parchment paper directly on the surface to reduce ice crystal formation.
- Store it in the coldest part of the freezer for best results.
2. Shelf Life
- Enjoy within 2 weeks for peak flavor and texture.
3. Softening for Scooping
- Before serving, allow the ice cream to rest at room temperature for 5–10 minutes to soften slightly for easier scooping.
- Avoid using a microwave to soften, as it may melt the ice cream unevenly.
4. Quick Tips
- To fix icy texture, mix or blend the softened ice cream before refreezing.
- Store away from foods with strong odors to maintain the ice cream’s flavor.
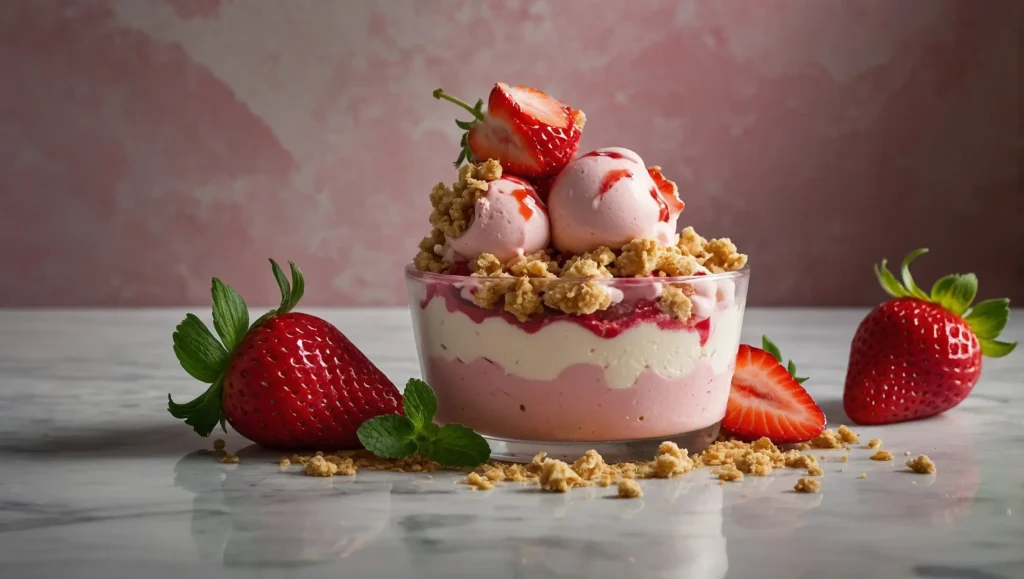
Serving Suggestions
Strawberry cheesecake ice cream is a treat you can enjoy in many ways:
- Classic Scoops: Serve in bowls or cones with a sprinkle of crushed graham crackers.
- Elegant Touch: Drizzle with strawberry sauce or chocolate and garnish with fresh mint or whipped cream.
- Pair with Desserts: Top brownies, pies, or waffles, or layer with fruit and cookies for a parfait.
- For Gatherings: Set up a toppings bar or make ice cream sandwiches with cookies or graham crackers.
- Refreshing Twist: Pair with iced coffee or lemonade for a summer delight.
Pro Tip: Serve slightly softened for the best texture and flavor.
Frequently Asked Questions (FAQs)
Here’s everything you need to know to perfect your strawberry cheesecake ice cream:
Do I need special equipment to make this ice cream?
Not at all! This is a no-churn recipe, so all you need are a mixing bowl, a whisk, and a freezer-safe container.
Can I use frozen strawberries?
Yes! Thaw the strawberries completely and drain excess liquid to prevent the ice cream from becoming icy.
How do I make it dairy-free?
Simply swap the cream cheese with plant-based cream cheese, heavy cream with coconut cream, and use sweetened condensed coconut milk instead of regular condensed milk.
Related Recipes
If you’re a fan of homemade desserts like strawberry cheesecake ice cream, here’s a list of must-try recipes that are equally delightful. Each one offers a unique twist, making it easy to expand your culinary repertoire:
- No-Churn Raspberry Cheesecake Ice Cream: A tangy raspberry swirl paired with creamy cheesecake flavors—just as easy to make as the strawberry version and just as irresistible.
- Lemon Curd Ice Cream: Zesty and refreshing, this lemon-flavored ice cream is perfect for those who enjoy a tangy treat with a velvety texture.
- No-Bake Mixed Berry Cheesecake: Combine strawberries, blueberries, and raspberries in this simple no-bake cheesecake for a burst of fresh summer flavors.
Conclusion
Congratulations—you’ve mastered the art of making strawberry cheesecake ice cream! This homemade treat is a delightful fusion of creamy cheesecake, fresh strawberries, and the perfect crunch of graham cracker swirls. It’s a dessert that not only satisfies your sweet tooth but also brings a sense of accomplishment knowing you made it yourself.
Whether you’re serving it at a summer barbecue, enjoying a scoop on a cozy evening, or impressing guests with a homemade dessert, this ice cream is sure to become a favorite. Plus, with all the tips, variations, and serving suggestions shared, you can customize it to make it uniquely yours every time.
The best part? You can take the reins and explore your creativity in the kitchen. Try the recipe, share your results, and don’t forget to experiment with fun twists! If you loved this recipe, explore the related desserts for more inspiration. Your next sweet adventure is just a scoop away!
Enjoy every bite—and happy cooking!